
The Project:
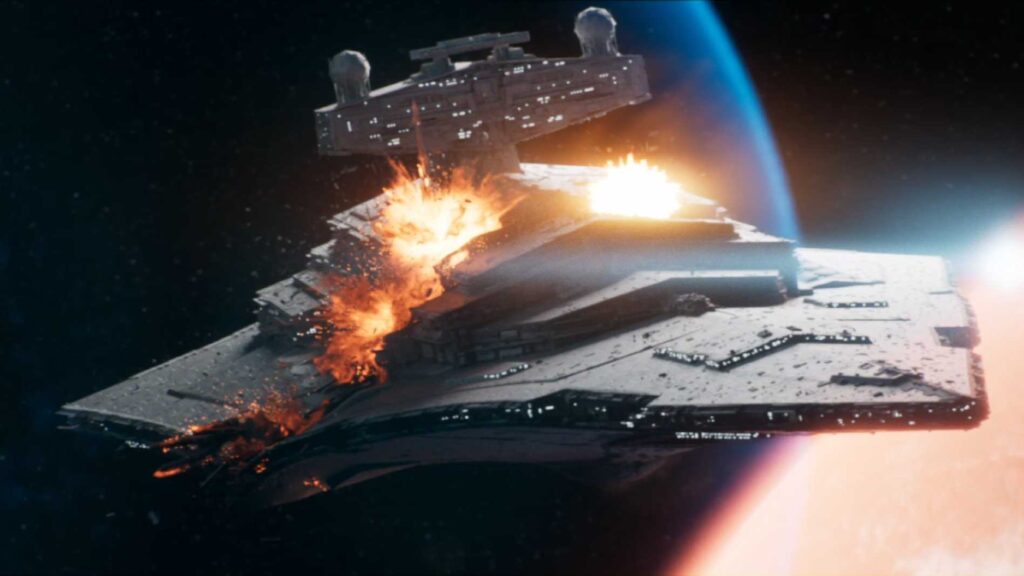
I am a huge Star Wars nerd, and I have always wanted to try to recreate the famous Seismic Charge explosion from Attack of the Clones. So I decided to to embark on a journey to make it in a personal project! I thought it would be cool to see the seismic charge rip open a Star Destroyer. I was also using this as an excuse to really nail down my personal USD->Karma rendering->comp pipeline.
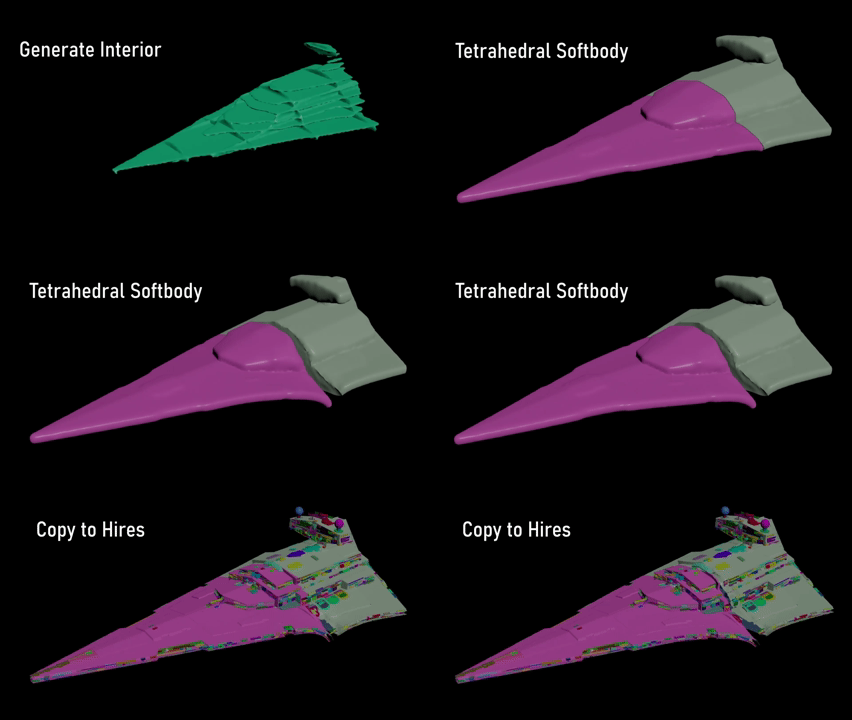
The first thing I did was get in touch with the very gracious Steven Knipping, who worked on the absolutely insane shot in Star Wars: Rogue One of a Star Destroyer colliding with another and completely tearing it in half. He gave me lots of very helpful advice, and also let me know that the main simulation that was involved there was a tetrahedral soft-body sim. I never in a million years would have come up with that myself, but if you think about it, it makes since! With large scale destruction of metal structures, you would see lots of bending and warping akin to a soft-body.
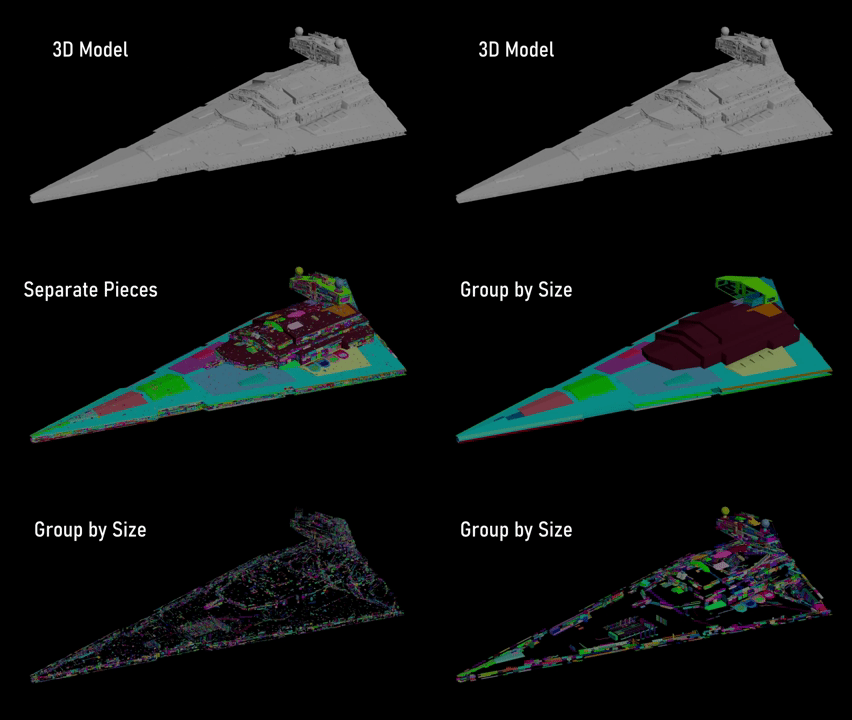
So off I went! I first found a pretty highly detailed model of a Star Destroyer and prepped it in Solaris. I fixed up the materials and made it a USD asset. I then imported that into SOPs to begin the FX work. I separated the pieces of the star destroyer out by size so that I could work on them in different ways. My plan was to do the large-scale soft body sim on the biggest pieces/overall hull, the medium pieces would be an RBD sim, and the smallest bits could just be simulated as particles.
Then I made some proxy geo and tetrahedralized it. I did a Vellum sim with some custom constraints that caused the pieces to stick together until a collider caused them to separate.
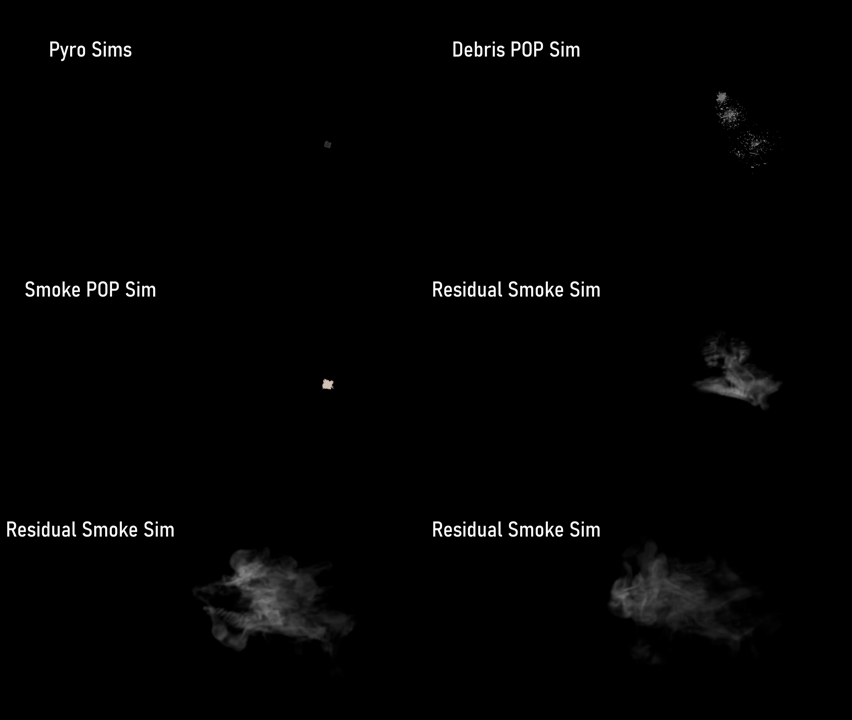
After that, I did some auxillary RBD, pop, and vellum grain sims on the medium and small pieces to get their reaction. This also contributed to the debris floating around!
Then it was time for some more auxillary simulations. I made some explosions with Axiom solver, and used their vel fields to do some pop debris sims and spark sims on top. I also did a large scale pyro sim to simulate dust being unsettled during the blast.
After all of that, I did some basic scene setup. I made materials, did some camera animation, and did some lighting. At that point it was time to render. I rendered all of these scenes in different passes in order to optimize render time and help me out when it came time for compositing. The planet in the background was a still image render of a separate scene that I was able to place in the background. I imported the USD scenes and cameras into Nuke in order to get the exact movement and tracking when adding post-render elements.
And that pretty much sums it up! This was an extremely fun and extremely educational project, and I’m so grateful for the attention it received online. If anyone has any deeper questions about my work, don’t be afraid to reach out and contact me!